
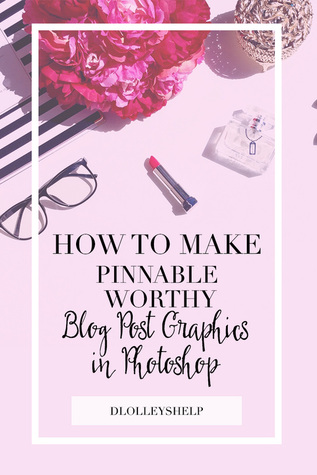
How To Make Pinnable Worthy Blog Graphics In Photoshop
- Before we get started you can download some free styled stock photo's for this tutorial HERE.
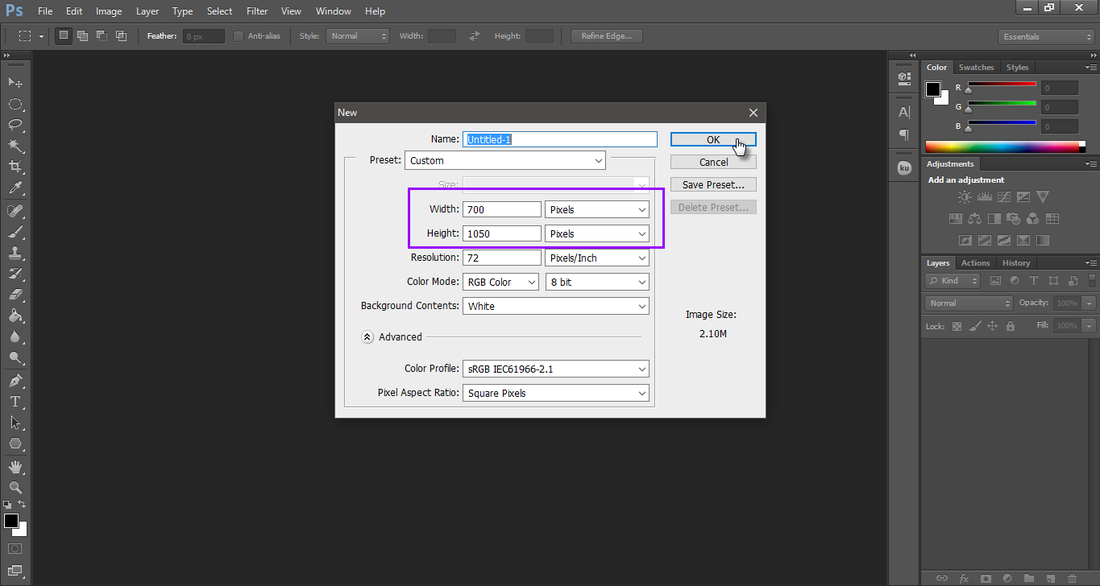
1. File- New 700x1050 pixels.
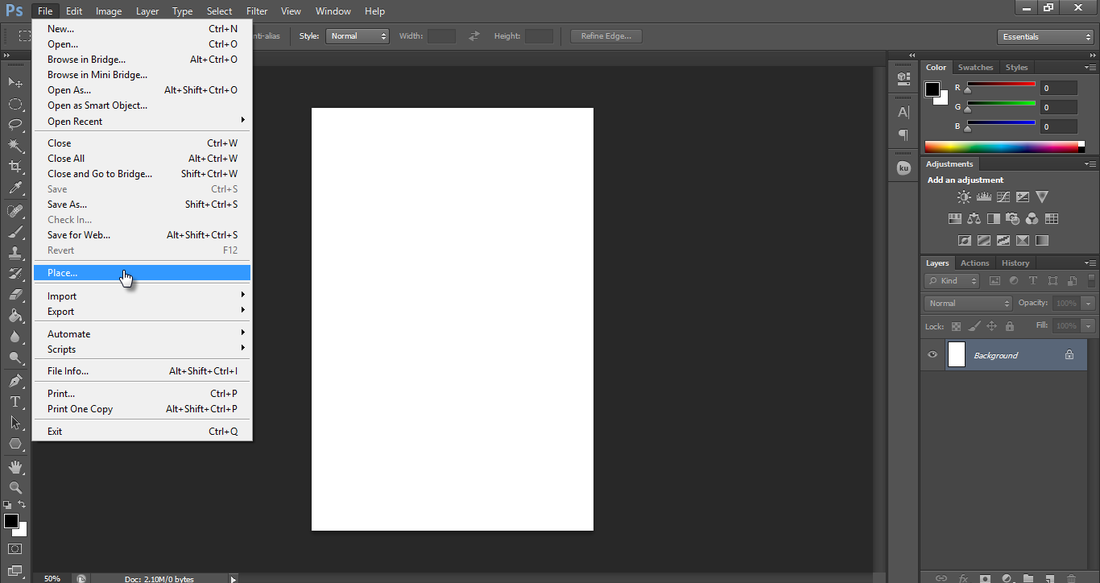
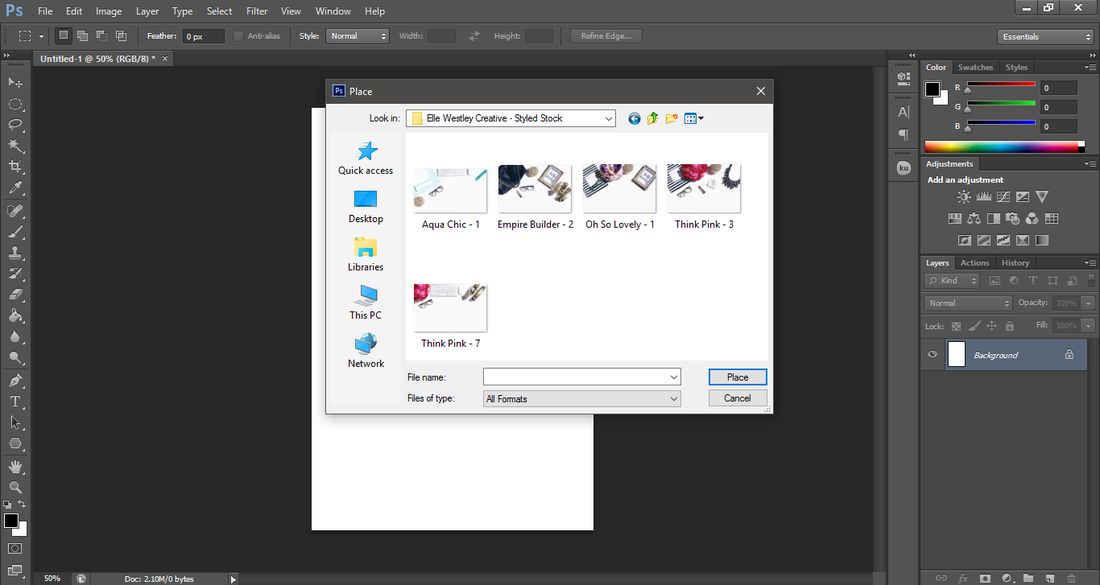
2. File- Place. This will allow you to place an image. Choose a styled stock photo of your liking.
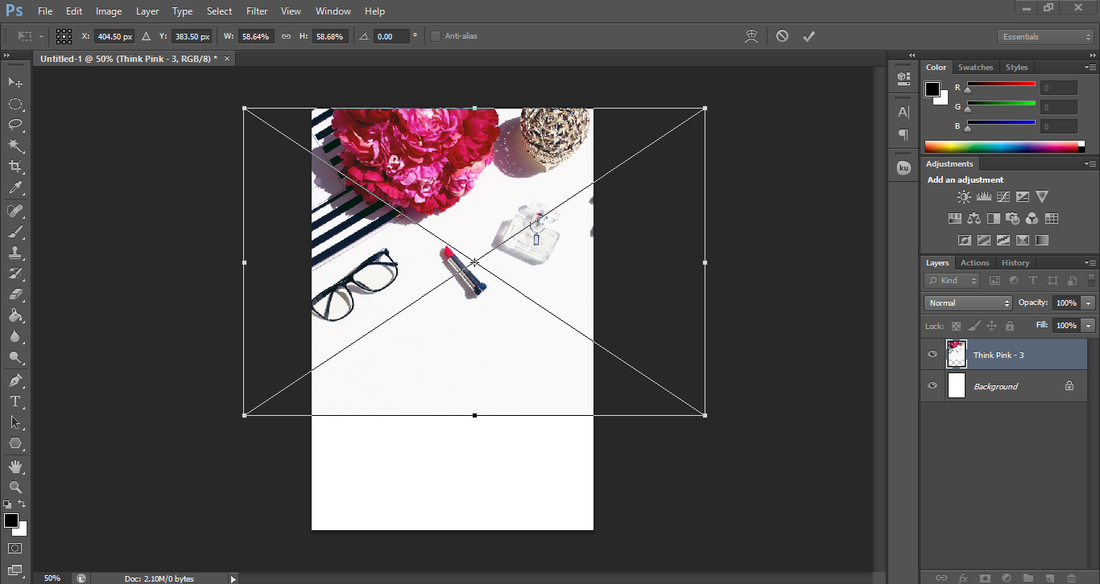
3. Use the transformation tool, holding shift on your keyboard drag the image to fit on your canvas layer.
TIP: You can also use the eye dropper tool to sample the background color of your styled stock photo then click on background, with the paint bucket tool and fill the background with the styled stock photo color.
TIP: You can also use the eye dropper tool to sample the background color of your styled stock photo then click on background, with the paint bucket tool and fill the background with the styled stock photo color.

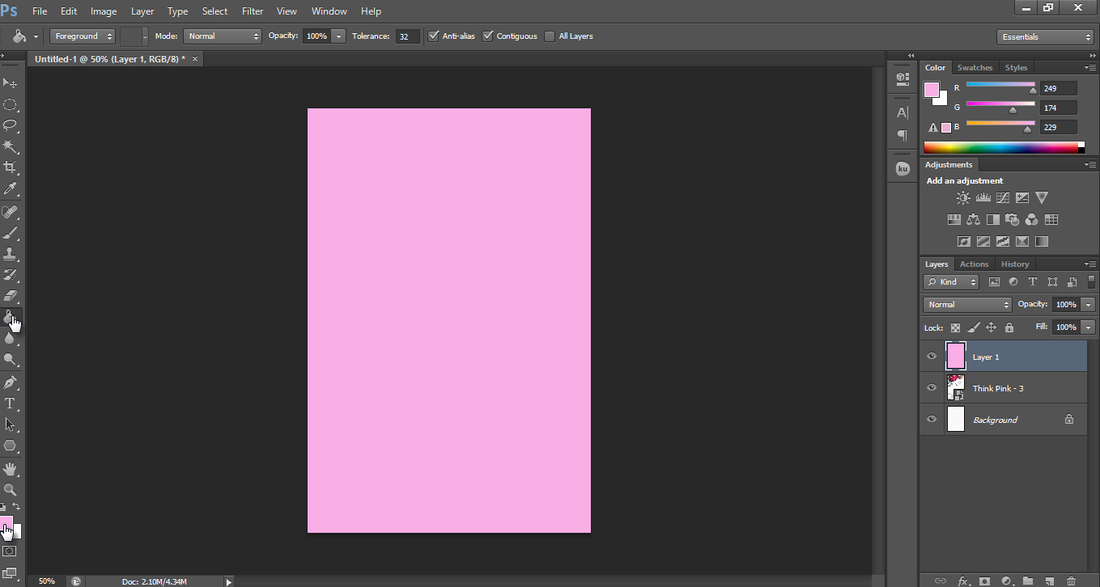

4. Create a new layer. Choose a color of your liking and fill the new layer with the bucket tool. Once you have done this bring the opacity down.
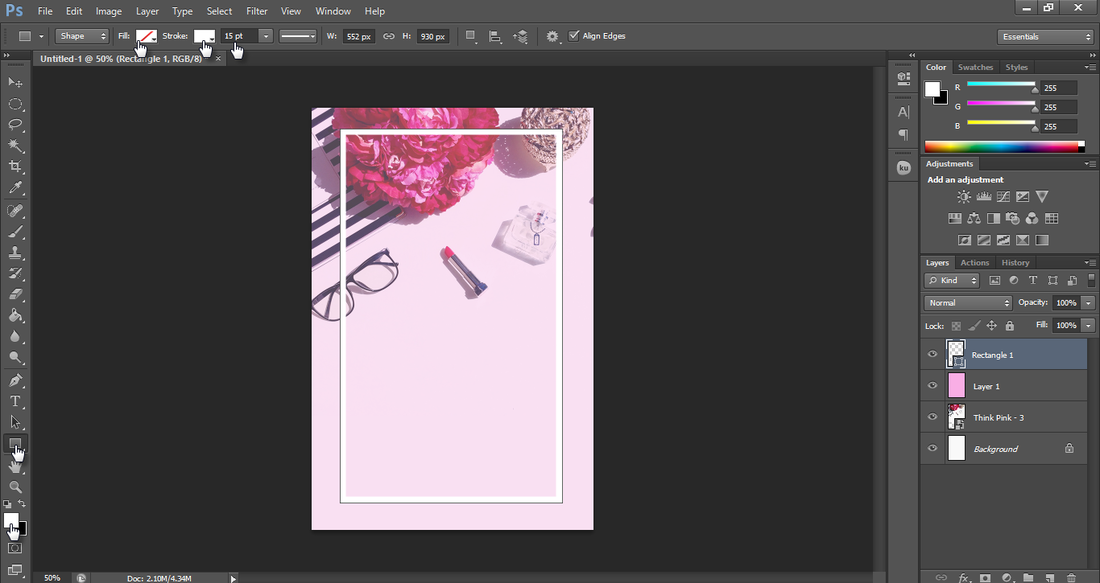
5. Choose the square custom shape tool. Choose the fill color to none at the top and the outline to a color of your choice. Change the line size between 5-15. Make an outline in the inside of your photo like I have above.
Tip: You can also choose the fill color to be a color of your choice and the outline to none and make a square in the inside of your graphic, then bring the opacity down to your liking,
Tip: You can also choose the fill color to be a color of your choice and the outline to none and make a square in the inside of your graphic, then bring the opacity down to your liking,
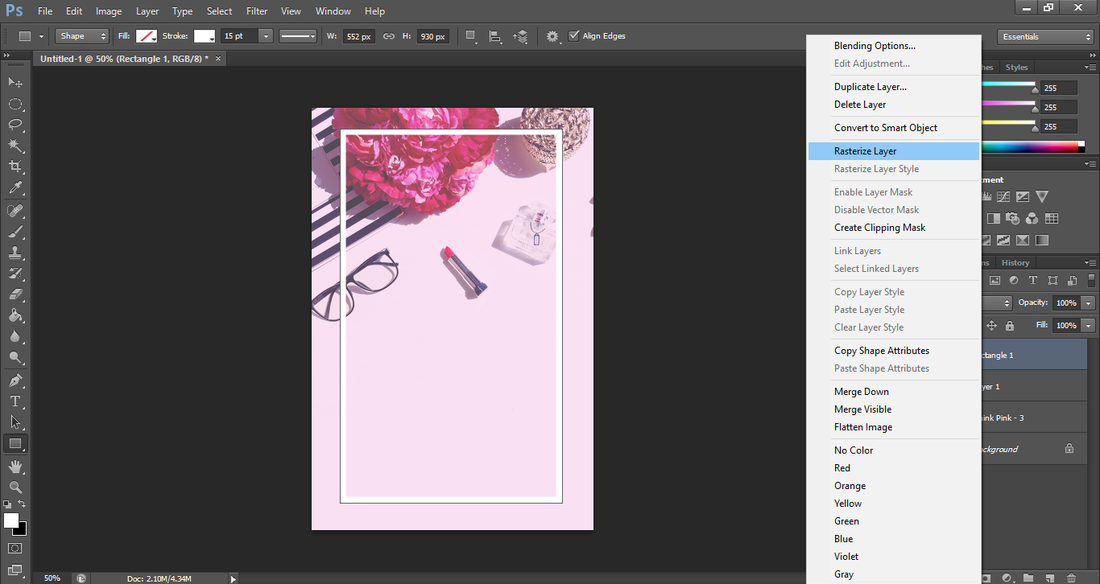
6. Once you are done with your outline, right click on the rectangle layer and choose Rasterize layer.

7. Using 2 pairing/matching fonts write the title of your blog post inside the outlines like I have done above.
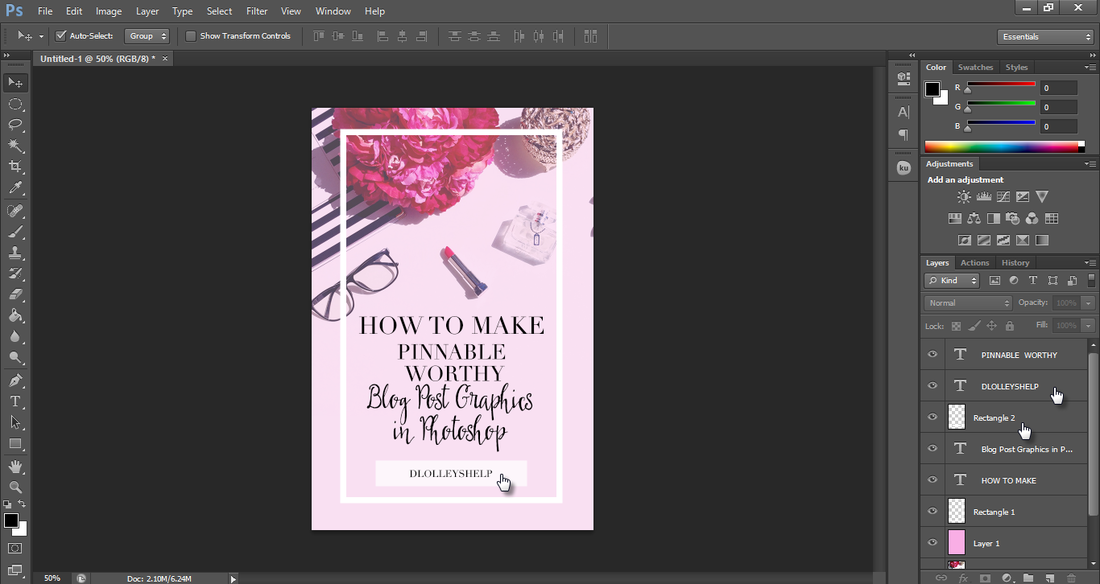
8. Use the rectangle shape tool and choose fill a color of your liking and outline to none. Make a small rectangle shape at the bottom of your graphic like so. Bring the opacity down and place your site name in this area. Merge layers and save. That's it you done it.
